Tuesday, July 28, 2015

PAPER MACHE LETTERS


I have used these pink + gold paper mache letters more times than i can count. They reside permanently above Kambree's crib, but I find myself taking them down over and over again to use them for another project. They are lightweight so I have added a velcro piece to the back of each of these so it makes it super easy to hang them up, and take them back down again! To make these letters I painted them pink with my favorite pink spray paint, then cut strips of gold vinyl and wrapped two strips of vinyl around each letter! Super simple and really versatile! I made a last minute decision to spell out ONE for Kambree's birthday photos and I am so glad I did. I literally made the O & the N fifteen minutes before we left for pictures, this project is super easy and quick!

I bought the letters from Joann's, you can get them here!


Wednesday, July 22, 2015

THE LITTLE GIRL WHO LOST HER NAME


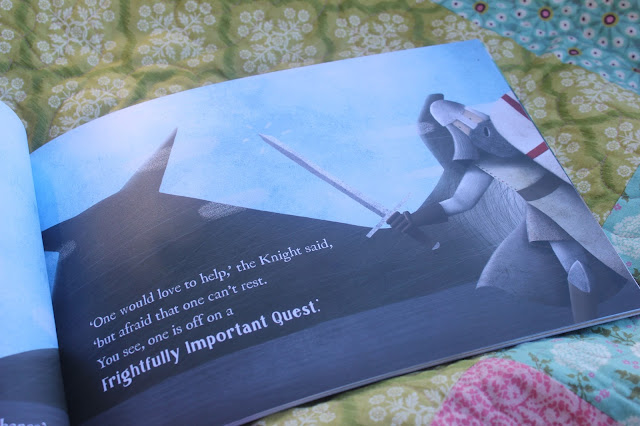
Kambree received the most darling book for her birthday, it was a personalized book about a little girl who had lost her name. As she goes searching for her name, she finds the letters one by one, and by the end of the book she has all the letters to complete her name! We have loved it, and I know as she gets older she will love it even more! It is so easy to get your hands on one of these books, just go to the website, type in the child's name and click girl or boy! It even lets you preview the book before you purchase it. The illustrations and darling, and the quality is amazing, we have been swooning over it ever since we received it!

Sunday, July 19, 2015

#DRESSTHERAINBOW


I have so enjoyed looking through the #dresstherainbow photos on instagram that I decided to join in on the #dresstherainbow fun this last weekend with my favorite girl! Have you??

Wednesday, July 15, 2015

HOW TO MAKE A FROSTED LEMONADE + FREE LEMON PARASOL PRINT

I don't know about you, but at our house, the obsession with frosted lemonade's from Chick-fil-A is real. I decided to test out the waters on making our own, and I am telling you right now, it's the real deal, they taste exactly the same! So save yourself a few bucks, and make them at home! I've also included the large and little lemon prints in this post. All you do is print + cut + put a little glue on the white flap and attach it to the opposite side + glue a bamboo stick to the inside of your parasol + pop it in your drink! Easy and sooo delicious + cute for a summer party!

Download Little Lemons
Download Large Lemons


Copycat Chick-fil-A Frosted Lemonade Recipe:

Ingredients:
    - 3/4 cup Fresh Squeezed Lemon Juice (about four lemons!)
    - 1/2 cup Sugar
    - 1 1/2 cups Water
    - 4 cups Vanilla Ice Cream
    - 1 tsp. Vanilla Extract
    - 1/2 cup of Ice

Directions:
    Combine all ingredients in the blender and blend until smooth. Make lemon parasol's + plop them in your drink & enjoy!

Monday, July 13, 2015

HELLO MAYPOLE MATCH-UP

   After I saw Aubry's post about new ideas for her felt balls, I knew I wanted to be a part of it. I decided I wanted to come up with something that my little one year old could play with, which meant something really simple. I thought a lot about the things we have been working on lately like, where her belly-button is, or how old she is and holding up one finger, she's one! Then I thought about how I could apply these felt balls to something we could learn from. She obviously isn't old enough to know her colors, but I thought it would be fun to work on matching things together. That is where I came up with the Hello Maypole Match-up! We have had a lot of fun playing with the magnets, it sure beats watching Octonauts, and maybe one of these days she will start figuring out the colors! I hope you enjoy the match-up game as much as we have!

Supplies:
   Hello Maypole Felt Balls - Ice Pop Colorway
   Hello Maypole Match-Up print - DOWNLOAD HERE
   Scotch repositionable magnetic tape
   Cookie sheet
   Hot glue gun
   If available, one-year olds are especially helpful, but not required;)
  
The how-to:
   1: I emailed the match-up print to the local staples, and had them make a 17x12 print on matte paper. I had them trim it down to fit inside the cookie sheet, and then had them laminate it for me.
   2: The next step was to apply magnets in each corner of the print to keep it attached to the cookie sheet. After that was done, I used hot glue to attach a small magnet to each felt ball.
   3: I put it on the cookie sheet and let my little one go to town on it! It makes a perfect activity for the car, church, or just a rainy day activity to switch things up a bit, enjoy!


Thanks for stopping by, be sure to tag us in your match-up's on instagram! We are @kambreeandco and @hellomaypole, we would love to see what you're up to! 

Saturday, July 11, 2015

DIY POLAROID BANNER

Guys. GUYYS!! I am so excited to share todays project with you! A little before Kambree was born Alexa over at alexamariezurcher.com asked me to try out her monthly stickers on my little one! (You can get the stickers here!) Of course I said yes, they were so darling, & then we took photos on the first of every month. I wanted to display all the fun photos at her party & polaroids are all the rage, so I decided to combine the two! 

For this project you will have to use something like illustrator, picmonkey, or gimp. I used illustrator, but I have used gimp in the past and it is pretty similar, and easy to use. I have provided the file for you, so all you have to do is insert the photo & save it! The file is a 5x7 so it would be simple to order the prints, there is a black line on the bottom so you know just where to crop it!


My original idea was to string it into a banner, but I couldn't bring myself to put holes in all the photos! Instead I went and picked up a pack of mini clothespins and painted them pink! That made it nice and easy to string it into a banner, and it looked darling at the party! Let me know if you need any help with the file, I would be happy to answer any questions!


 If you turn your pictures polaroid be sure to tag us @kambreeandco we would love to see what you are working on! Happy Weekending!!


Tuesday, July 7, 2015

BALLOON TASSELS

This month Kambree & I both have birthdays. Hers is the first, and mine, the thirty-first. (She was nine days late, insisting that we share a birthday month, but that is a long story for another day!) We are going to be celebrating all month long, so check back for more birthday DIY inspiration!

Balloon Tassels

Materials:
Plastic tablecloths
Rotary cutter/cutting mat or scissors
Hot glue gun
Thick string or rope (I used jute)
A pencil

Step 1:
Cut out one inch strips for your tablecloth, I like the tassels to look more full, so I use about 10-15 tassels per bundle, depending on how full I want it to look. 


Step 2: 
Lay strips in all directions over the pencil. 


Step 3:
Once you have all your strips placed, scoop it up, and twist it underneath the pencil. Use one of the hanging strips in your tassels to wrap around the area just under the pencil. Hot glue the end of that strip in place.
Step 4:
Tie all the tassels onto your rope. I had quite a few more tassels tied onto the rope I used for Kambree's pictures, but I ended up cutting them off so that the balloon was closer to her. That's it! It is a pretty simple DIY, but it sure brightens things up!